Network resources

How do I connect to the ethernet ports in STAT ESB offices?

Each office in the ESB building will have one or more ethernet ports which are used to connect to high speed wired UBC internet and will also allow you to print directly from your office to one of our available printers in the Mailroom or ESB 3163 meeting room https://www.stat.ubc.ca/faqs/how-do-i-add-statnet-printers-my-personal-laptop-desktop 

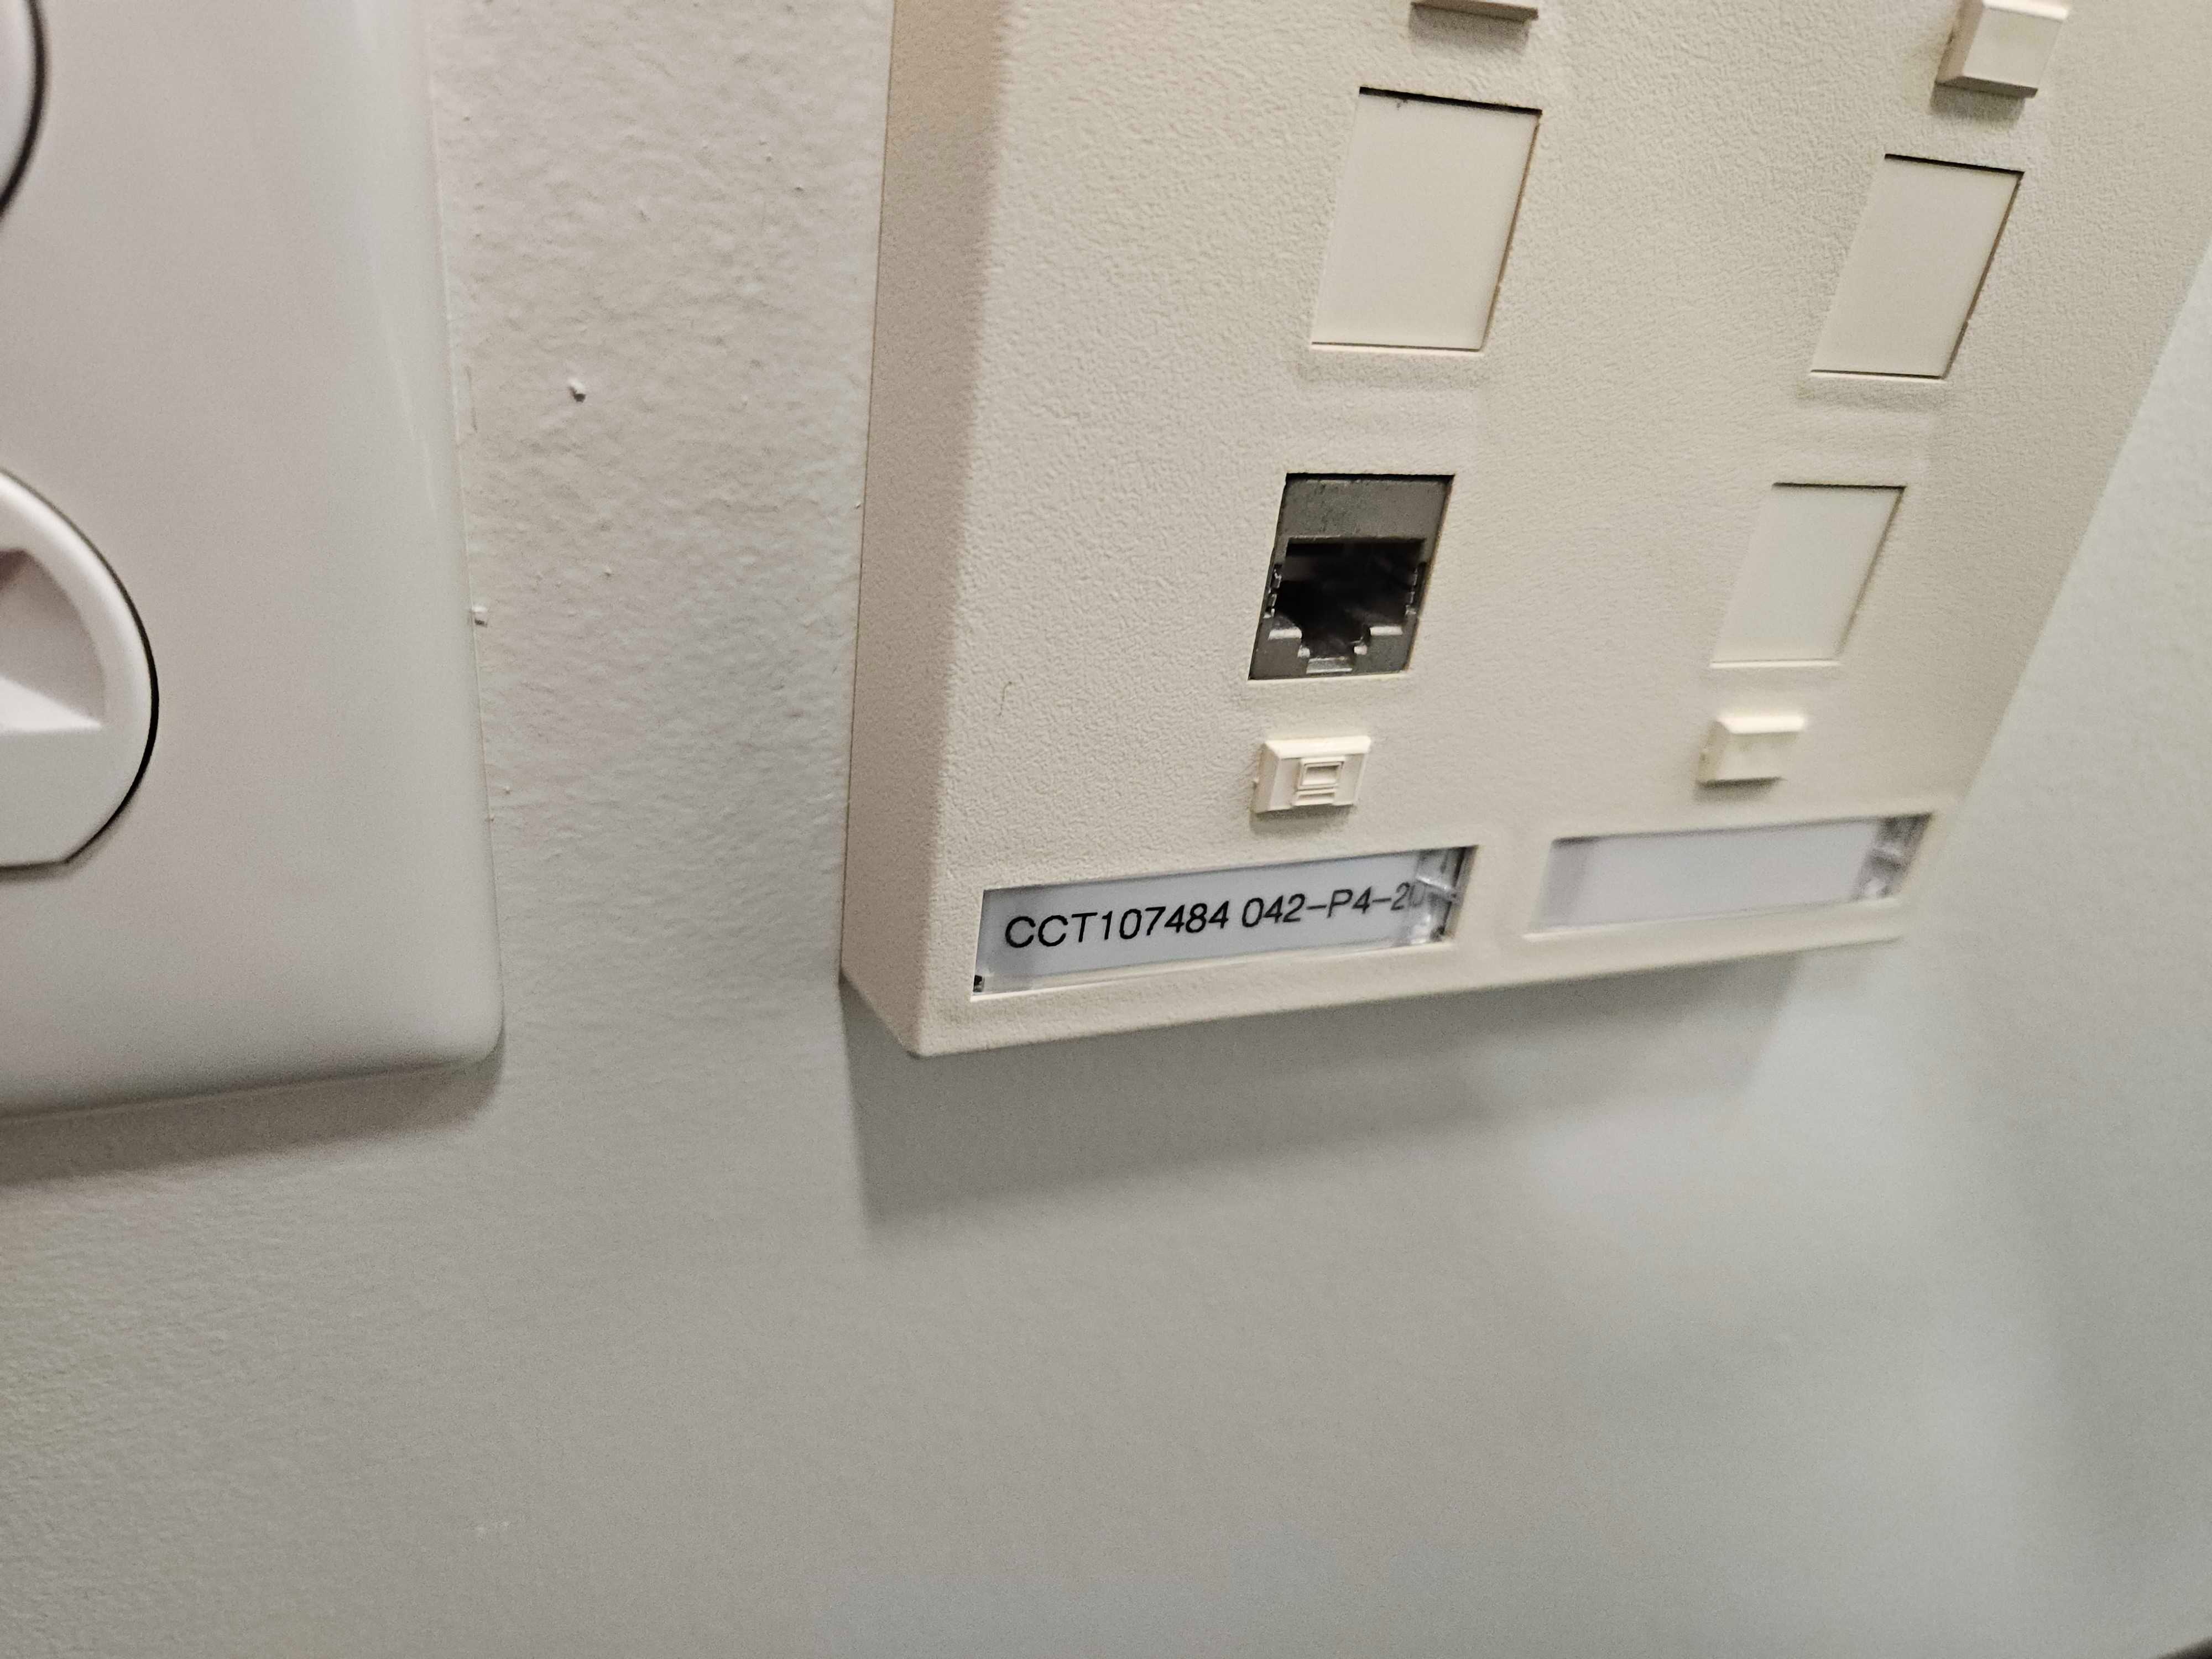
Ethernet ports will be on the wall near the floor and look like the following image:

ethernet port

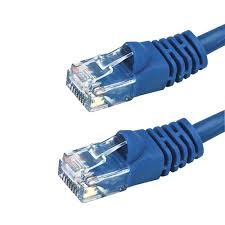
To connect to a port, first you will need an ethernet cable (example below). If there is one already connected and unused, then continue to the next step. If not then contact help@stat.ubc.ca to request a cable or if there are no ethernet ports left available. One cable end will plug directly to an ethernet port and the other to your device (laptop/desktop/adapter).

7FT 24AWG Cat5e 350MHz UTP Bare Copper ...

Next to allow your device to communicate with the ESB wired network, you will need to collect the MAC address of your device. The MAC address uniquely identifies your device when it's on the network and consists of 12 hexadecimal characters e.g. 00:1A:2B:3C:4D:5E or 00-1A-2B-3C-4D-5E

Follow one of the below instructions depending on your situation.

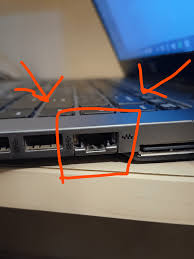
Laptop/Desktop: If it has its own ethernet port (example shown below on left), help article here https://computing.stat.berkeley.edu/kb/mac-address/ to get its MAC address.  

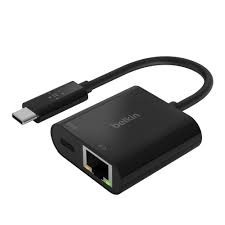
Adapter: If your laptop/desktop doesn't have a built in ethernet port, then you'll need an ethernet adapter (example shown below on right), if you have one then collect the MAC address of the adapter instead (should be printed somewhere on the back of the adapter, if not then the above guide should help retrieve the address). If you need an adapter and would rather not purchase one yourself then you can request to loan one from STAT IT help@stat.ubc.ca.

What is? this port : r/laptops USB-C to Ethernet Adapter + 60W Charge ...

Then send the MAC address to help@stat.ubc.ca so your device (laptop/desktop/adapter) can be whitelisted and used with the ESB wired network. Once IT confirms that your device is whitelisted, then you can connect the ethernet cable to your device and it should recognize the network automatically.

If you still have issues connecting to the wired network, then note the ethernet port ID (alphanumeric tag under the ethernet port itself) and room number and contact help@stat.ubc.ca with this information.

FAQ Category

StatNet public servers location, specs and software installed

1) StatNet servers:
Number crunching servers: Access via "ssh" remote login.
Linux servers : Dell R900, 16 CPUs, 16-32Gb RAM. Name after Bugs : Bee and Spider are standalone  number crunching.
Virtual Linux servers: 2 CPUs, 2Gb RAM: Gosset1
Cloud Computing: contact us for more detail.
Can only access via SSH.
Software: R, C, C++, Fortran, Matlab 2009a , Java and Stata (Stata only on Gosset1 ).

MacPro servers : 8 CPUs, 8-16Gb RAM. Name after Mountain: Cypress, Grouse, Baker, Seymour: Can access via SSH and its  console which located in Research lab lsk303a.  You need Secure Card access to enter.
Software: OS Mac OS X Leopard, Same as Linux except R = R64 (64-bit) and Matlab 2009a

SUN Solaris 10 Unix servers:  Access via "ssh" remote login.
   Be.stat.ubc.ca for pine, mutt, elm and general file management only
   Unixlab for IT admin only

2) Ugrad Math/Stat Computer labs
Notes: You can ONLY acess Windows server within StatNet.
Download Microsoft  Remote Desktop software for your OS
Mac: Remote Desktop Connection Client 2.1
Linux: Rdesktop
Windows: Come with all OS

LSK 121: SUN Unix Solaris 10 servers
Server names: Unixlab and Statlab
Software: R, and most opensource packages

LSK 121: Windows 2003 terminal servers
Server names: windows.stat.ubc.ca
Software: Matlab, Maple, MS-Office, R, Octave, OpenBUGS/WinBUGS, TeX/LaTeX, XPP

ESB 1042 and ESB 1046: Mac OSX Lion 10.7.5 workstations
Software: Matlab, Maple, R, OpenOffice and some opensource packages

LSK 310: Windows 7 workstations
Software: Matlab, Maple, MS Office, Lindo/Lingo , R, Octave, OpenBUGS/WinBUGS, TeX/LaTeX, XPP

FAQ Category

How to get an xterm on a MacIntosh (in order to run ssh to a Unix computer)?

The following is initialization.

  • Double click MacIntoshHD icon on Desktop
  • single click Application
  • double click Utilities
  • click X11 and drag to the shortcuts to the icons at the bottom of the Desktop

For future log-ins, just click on the X11 icon to open the first xterm. Other xterm's can then be opened from the Applications menu (top of Desktop).

From an xterm, use 'ssh' to get to a remote computer. X11-applications can be displayed from the remote computer to the MacIntosh display.

FAQ Category

Terminal MacOS X Native setup. (Not X-Term)

non-X-Terminal has proper copy and paste using Mac Command+c or v keyboard.

Click on Local Hard Drive -- Applications -- Utilities 
Highlight Terminal Icon (Black) - Drag and Drop it to the Bottom Menu Bar

Click once on Terminal Icon to open new terminal.
Click on the top left menu "Terminal" - Preferences  to customize your terminal session

a)Font:  Text -- Change
b)VT100: Advance -- Emulation -- Declare Terminal as VT100
 Close Terminal' s preferences and restart Terminal to make the changes in effect.

FAQ Category

How to get copy-paste with left-right-middle mouse buttons (traditional X11) with MacIntosh?

  • lick System preference icon at bottom of Desktop
  • click on mouse/keyboard
  • make changes on menu so that left button is primary, right button is secondary, and dashboard is button 3.

After this, copy-paste operations are like traditional X11; (a) click with left mouse button to begin highlighting, (b) drag to end of highlighting, or use right mouse button to click end of highlighting region, (c) move mouse to location for pasting and click middle mouse button.

FAQ Category

How to change Mac OSX Password?


Resetting a user's password in Mac OS X v10.5 or later
 

  1. Log in with your default account.
  2. From the Apple menu choose System Preferences.
  3. From the View menu choose Accounts.
  4. Select Your username then Click "Change Password..." button (Mac OS X v10.5 or later).
  5. Enter your old password and your new password in both the Password and Verify fields, and add a hint if desired.
  6. If a dialog box appears with the message "Your Keychain password will be changed to your new account password..." click OK.
FAQ Category